How to create Alert Policies in Office 365 Security & Compliance Center
In this article I will show you how to setup log alert polcies for Office 365 administrators. There is a long list of alerts that can be configured, see list below. Before you begin you will need to enable audit logging in the new Office 365 Security & Compliance Center.
Enable Audit Logging
- Login to the Security & Compliance Center at https://protection.office.com
- Click Start recording user and admin activity on the Audit log search page.
It may take several hours to be enabled and for logs to appear.
Grant Required Permissions to be able to create alert policies
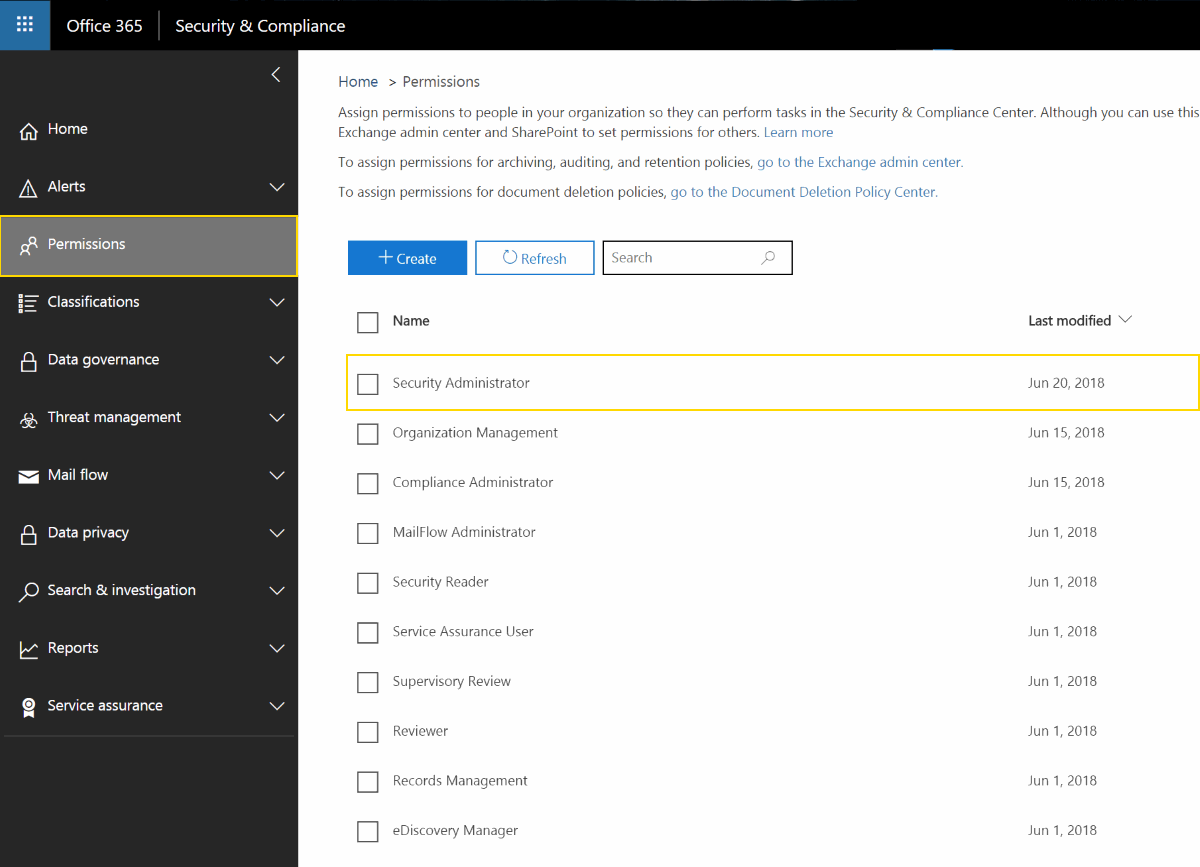
To be able to create new alert policies you must add your Office 365 user account to the Security Administrator group within Security & Compliance center. These steps must be done even if you are already an Office 365 Administrator.
- Choose Permissions and tick the checkbox next to the Security Administrator group


- In the right preview pane, Click Edit role group or click Edit next to Members.


- Click Choose members and Edit
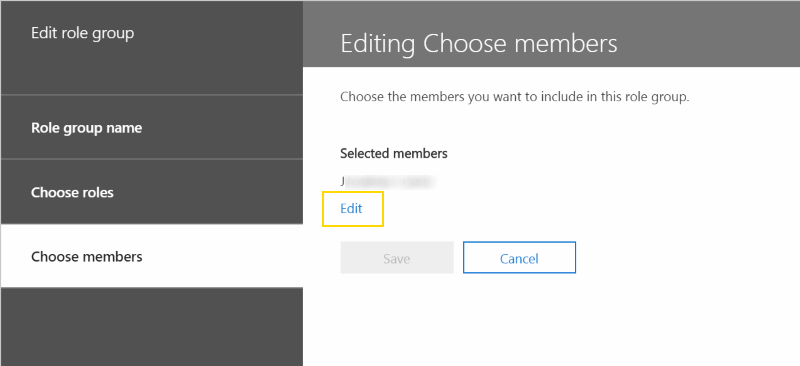

- Click Add, choose your user account and then click Done


- Step 5
Create a new log alert policy
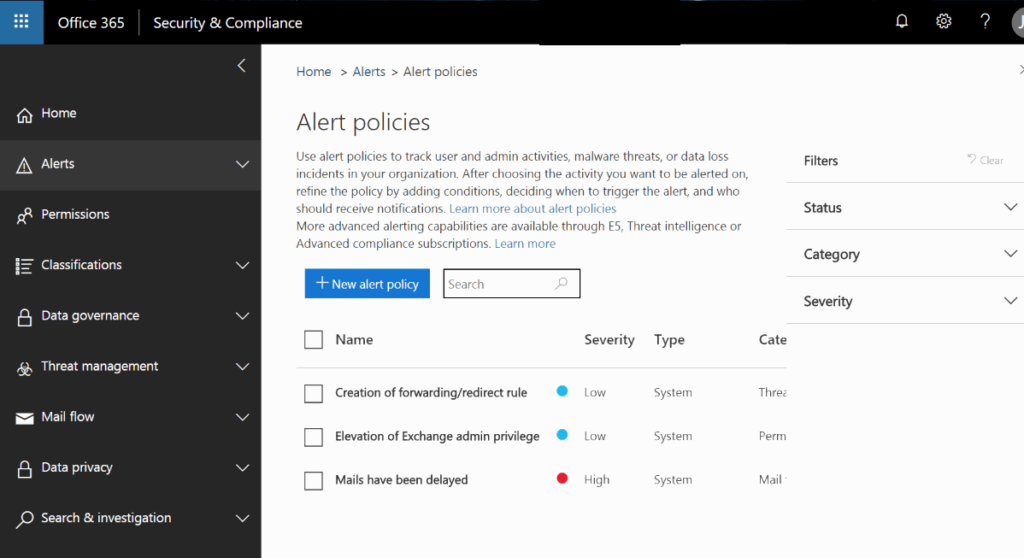
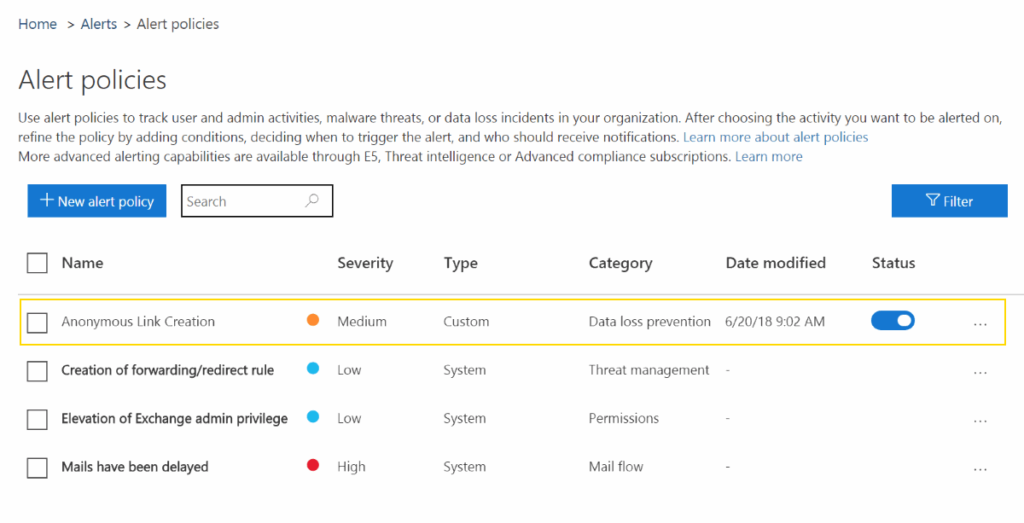
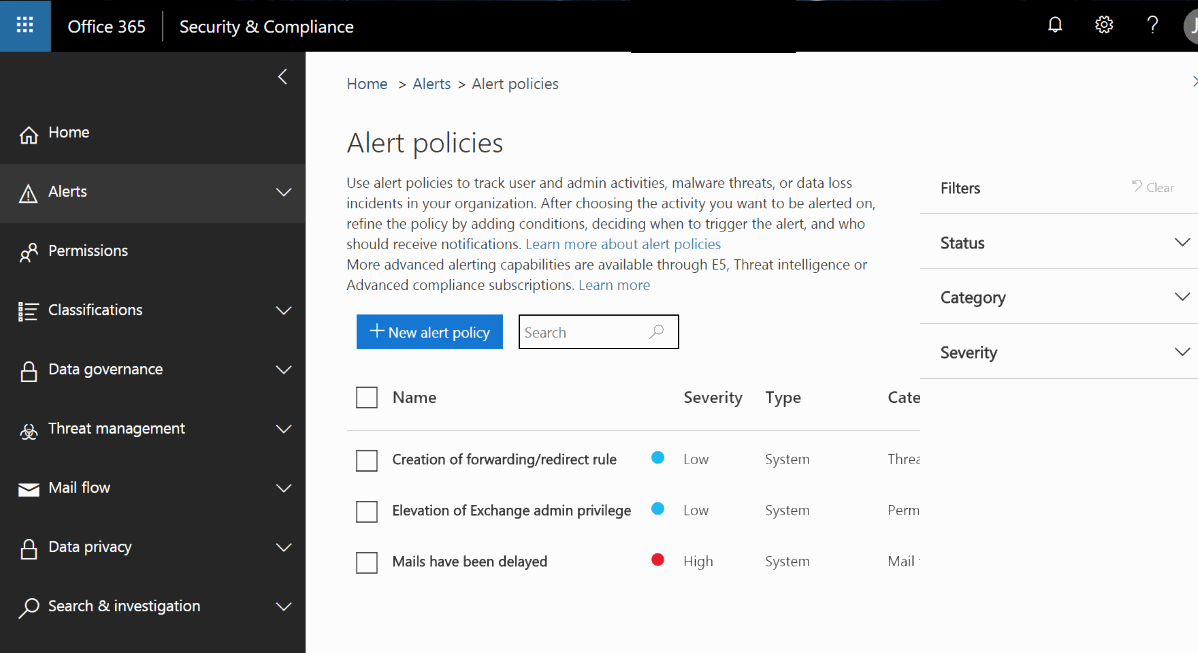
When you visit the Alerts | Alert policies page you will see that Microsoft has created some preconfigured alerts. For this example we are going to create our own log alert that fires everytime an Office 365 user creates an anonymous share link from OneDrive or Sharepoint. This is a good alert to have configured since anonymous links can lead to data leakage.
- Choose Alerts | Alert policies from the left nav menu and click the blue + New alert policy button.
If you do not see this blue button you will need to grant yourself the required permissions within Security & Compliance center, see steps above.

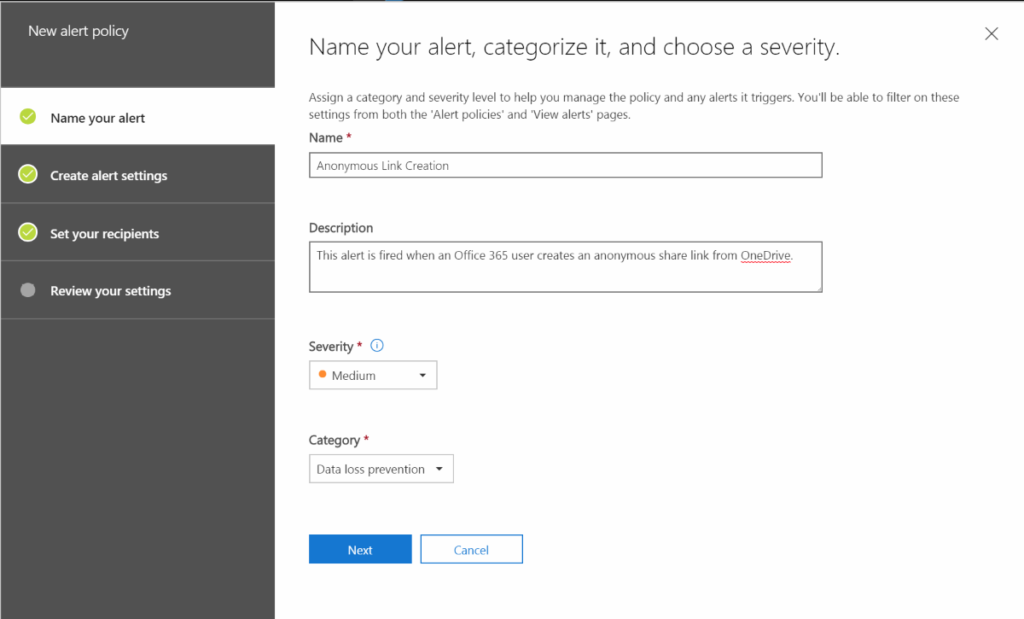
- Give your alert a Name, Description, and Severity then click Next.

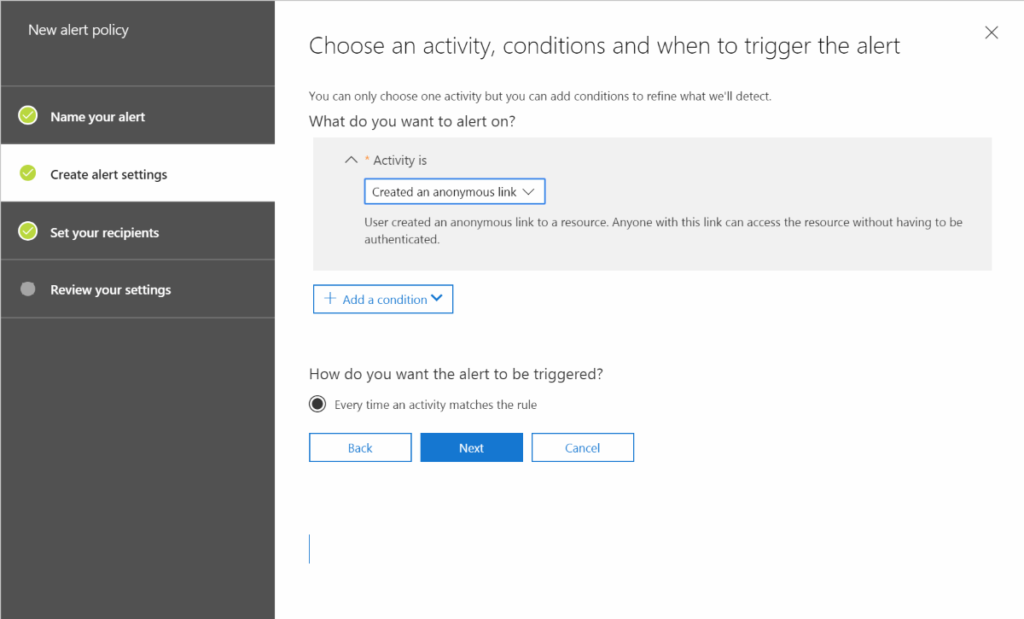
- Chose the activity you would like to alert on, in this example choose User Created an anonymous link and click Next.
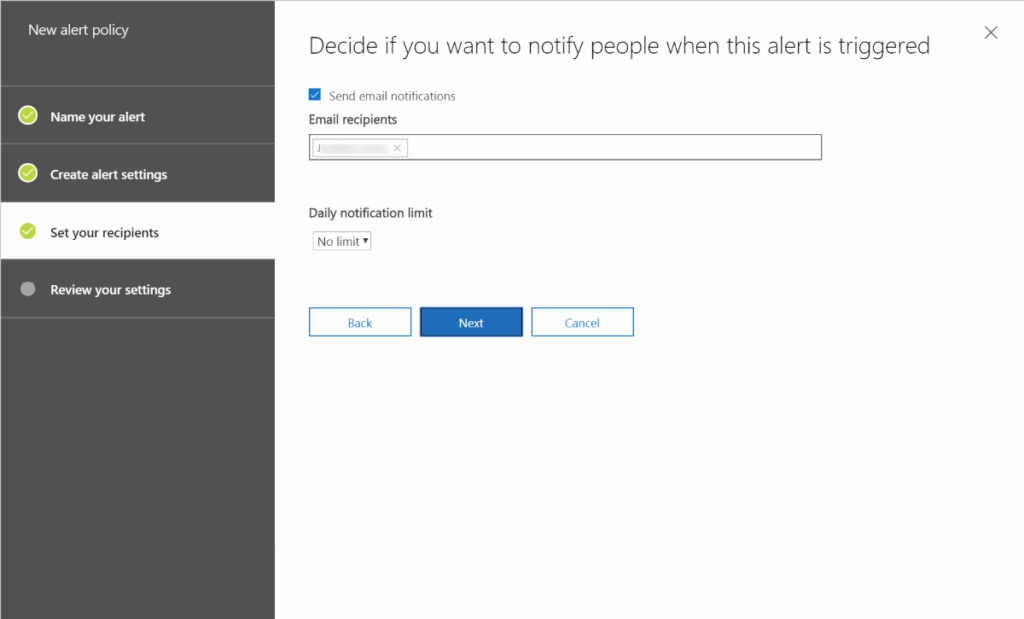
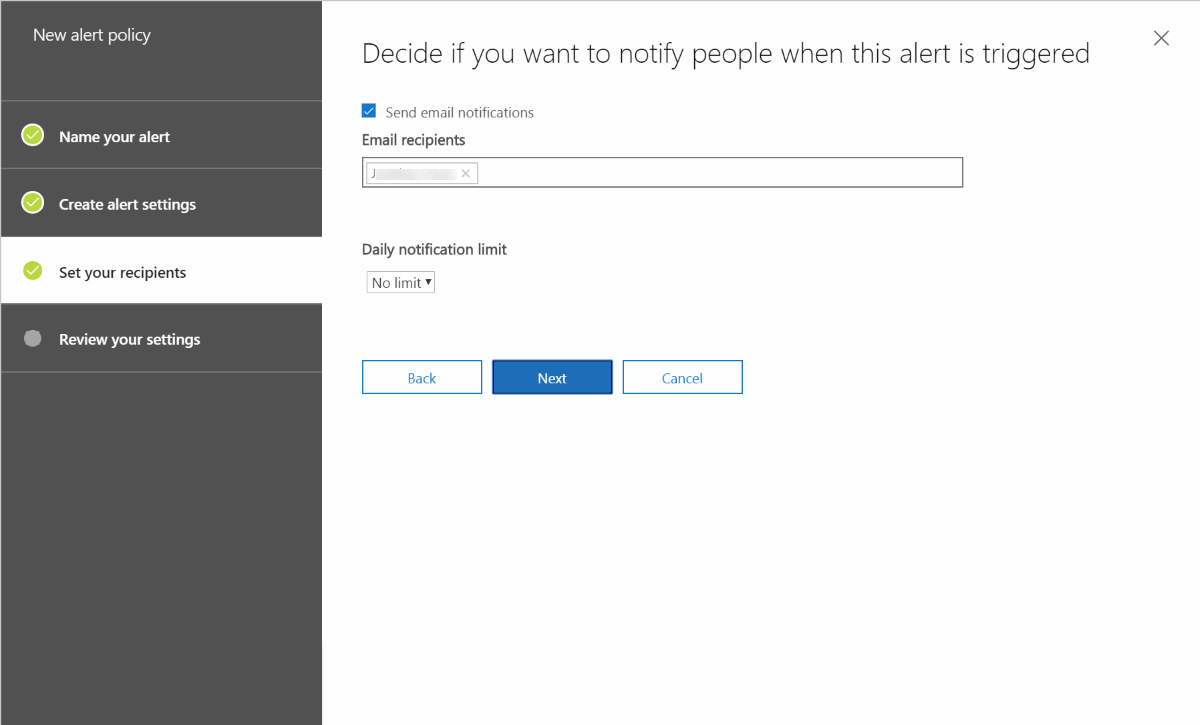
- Enter the email address(es) of people you would like to receive the alert and click Next.
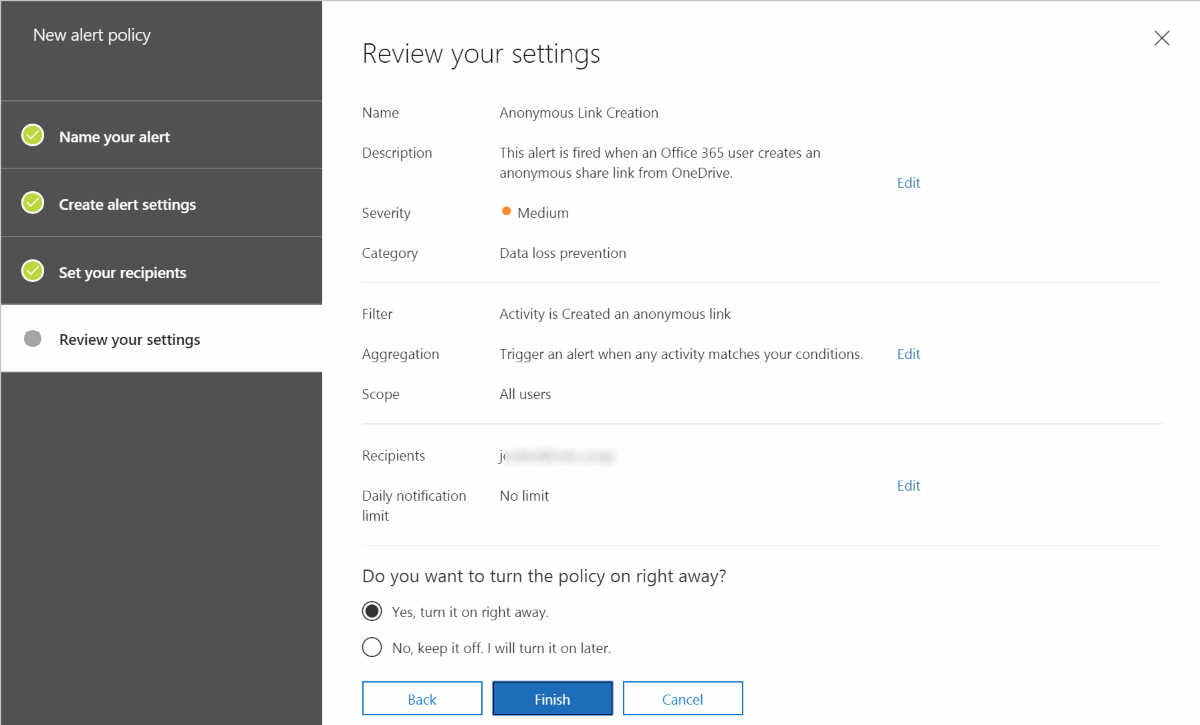
- Review your settings and click Finish

- Our newly created Alert policy is now active, Congratulations!


List of Available Log Alerts
Common user activities
- User submitted email
- Detected malware in file
- Shared file or folder
- Created mail forward/redirect rule
- Any file or folder activity
- Changed file or folder
- Shared file externally
- Granted Exchange admin permission
- Granted mailbox permission
- External user file activity
- DLP policy match
File and folder activities
- Accessed file
- Checked in file
- Checked out file
- Copied file
- Deleted file
- Discarded file checkout
- Downloaded file
- Modified file
- Moved file
- Renamed file
- Restored file
- Uploaded file
File sharing activities
- Accepted access request
- Accepted sharing invitation
- Created a company shareable link
- Created access request
- Created an anonymous link
- Created sharing invitation
- Denied access request
- Removed a company shareable link
- Removed an anonymous link
- Shared file, folder, or site
- Updated an anonymous link
- Used an anonymous link
Synchronization events
- Allowed computer to sync files
- Blocked computer from syncing files
- Downloaded files to computer
- Downloaded file changes to computer
- Uploaded files to document library
- Uploaded file changes to document library
Site administration activities
- Added exempt user agent
- Added site collection admin
- Added user or group to SharePoint group
- Allowed user to create groups
- Changed exempt user agents
- Changed a sharing policy
- Created group
- Created Sent To connection
- Created site collection
- Deleted group
- Deleted Sent To connection
- Enabled document preview
- Enabled legacy workflow
- Enabled Office on Demand
- Enabled RSS feeds
- Enabled result source for People Searches
- Modified site permissions
- Removed user or group from SharePoint group
- Renamed site
- Requested site admin permissions
- Set host site
- Updated group
Thanks for following along! Leave a comment below if you have anything to add. I hope this tutorial for Office 365 Admins has helped you out, you may also be interested in my article…
