
Sierra GX450 LTE Modem .•. Essentials Guide
This a quick reference guide to configuring and troubleshooting the Sierra Wireless GX450 4G/LTE modem. This rugged little modem/router is perfect for vehicle mounting and is packed with features including Firewall, VPN, 9-pin Serial server, and GPS AVL tracking.
Default Username and Password, IP Address
Username: user
Password: 12345
LAN IP Address: 192.168.13.31
Subnet Mask: 255.255.255.0
DHCP Server Enabled: Yes
Admin Interface (ACEmanager)
URL: http://192.168.13.31:9191
or over SSL: https://192.168.13.31:9443
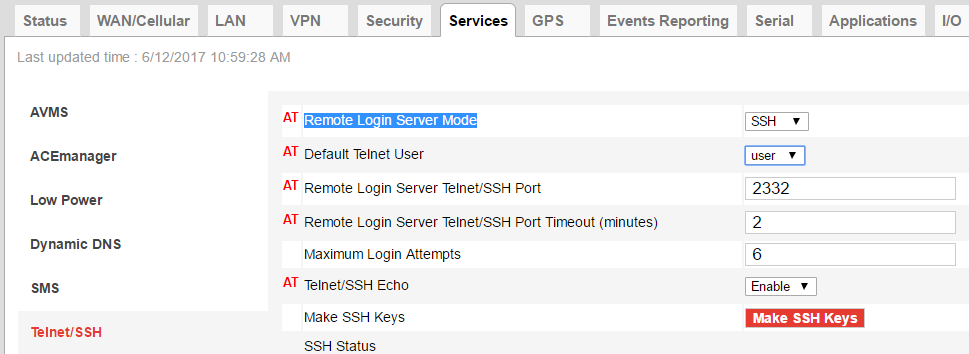
Default SSH Port: 2332
SSH server is not enabled by default but once enabled the default SSH port is TCP 2332. Telnet can also be enabled using the same port by default. However, you cannot enable both telnet and SSH.
GX450 disable telnet access
- Login to ACEmanager and navigate to “Services | Telnet/SSH”
- Set “Default Telnet User” to none
GX450 SSH access
- Login to ACEmanager and navigate to “Services | Telnet/SSH”
- Set “Remote Login Server Mode” to SSH and “Default Telnet User” to none
GX450 Factory Reset Button (Restore Defaults)
With the device powered on, holding the Reset button down for 7–10 seconds to resets the GX Series gateway to its factory default settings. Momentarily press and release the button to reboot the GX Series gateway.
How to restore defaults from ACEmanager web interface
Login to ACEmanager and navigate to “Admin | Advanced” and click the “Reset to Factory Default”
How to upgrade the GX450 firmware (ALEOS Firmware)
Important: Old version of ALEOS Firmware must be upgraded incrementally. Carefully read the firmware release notes and follow any incremental upgrade notes to avoid bricking your device.
- Download the latest firmware from Sierra Wireless’ website and extract the zip file.
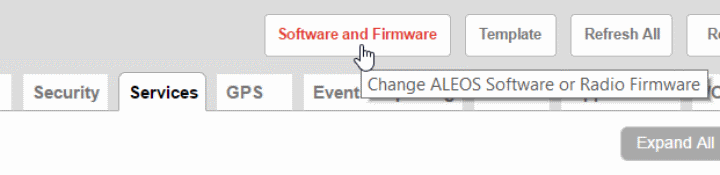
- Login to ACEmanager and click the red “Software and Firmware” button

GX450 Firmware Update Button – ACEmanager screenshot - Tick the “ALEOS Software” radio button, browse to choose the .bin firmware file and click “Update”
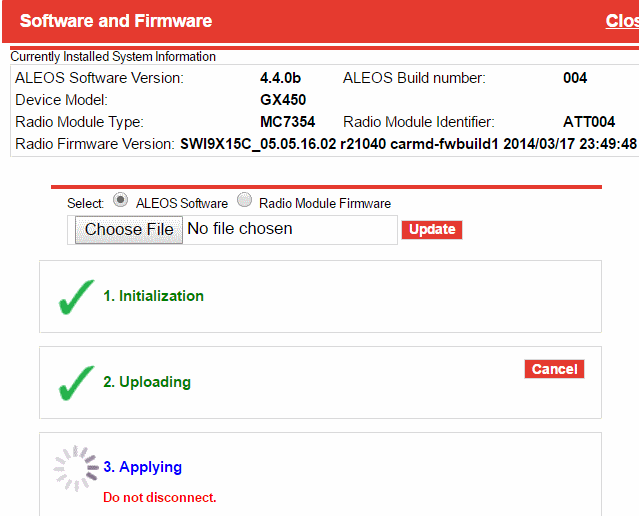

- After the device is upgraded(2-3 minutes), you will repeat these steps but select “Radio Module Firmware” and feed it the bundled .iso file.
Input Voltage Range of the GX450 Modem
Input Voltage: 9-36 volts DC
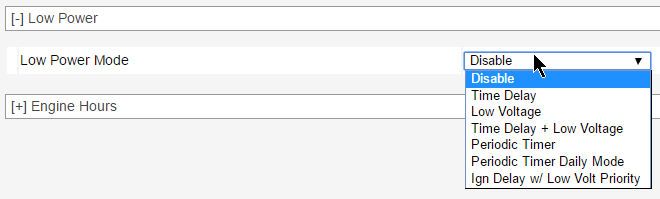
The modem has a proprietary 4-pronged power connector which can be purchased as a AC wall-wort or an unterminated DC power wire for connect to a vehicle power source. The unit is rated at a max power consumption level of 1000 mA but average power usage is around ????? or ???? watts. This modem can be configured using 6 different power save settings.
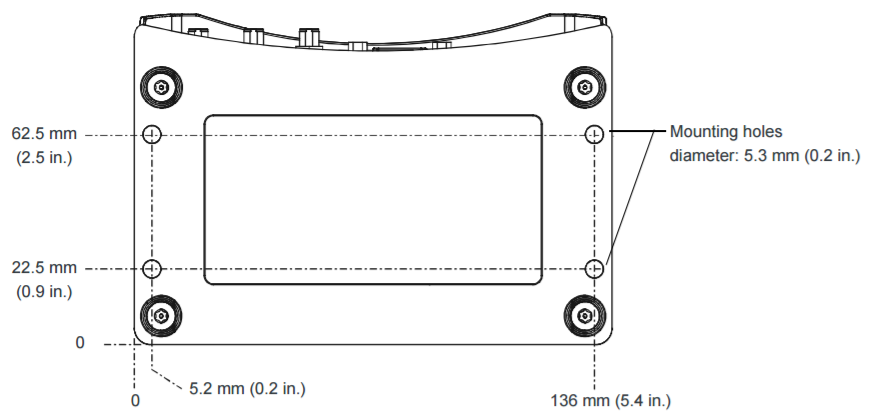
GX450 Mounting Dimensions
What size SIM card does the GX450 use?
The GX450 uses a mini-SIM (or 2FF) card measuring (25 mm x 15 mm). If you only have a smaller Micro-SIM or Nano-SIM you can purchase a SIM card adapter kit for under $3 here. To access the SIM card slot you must remove the 4 black screws on top of the unit.
GX450 Photos
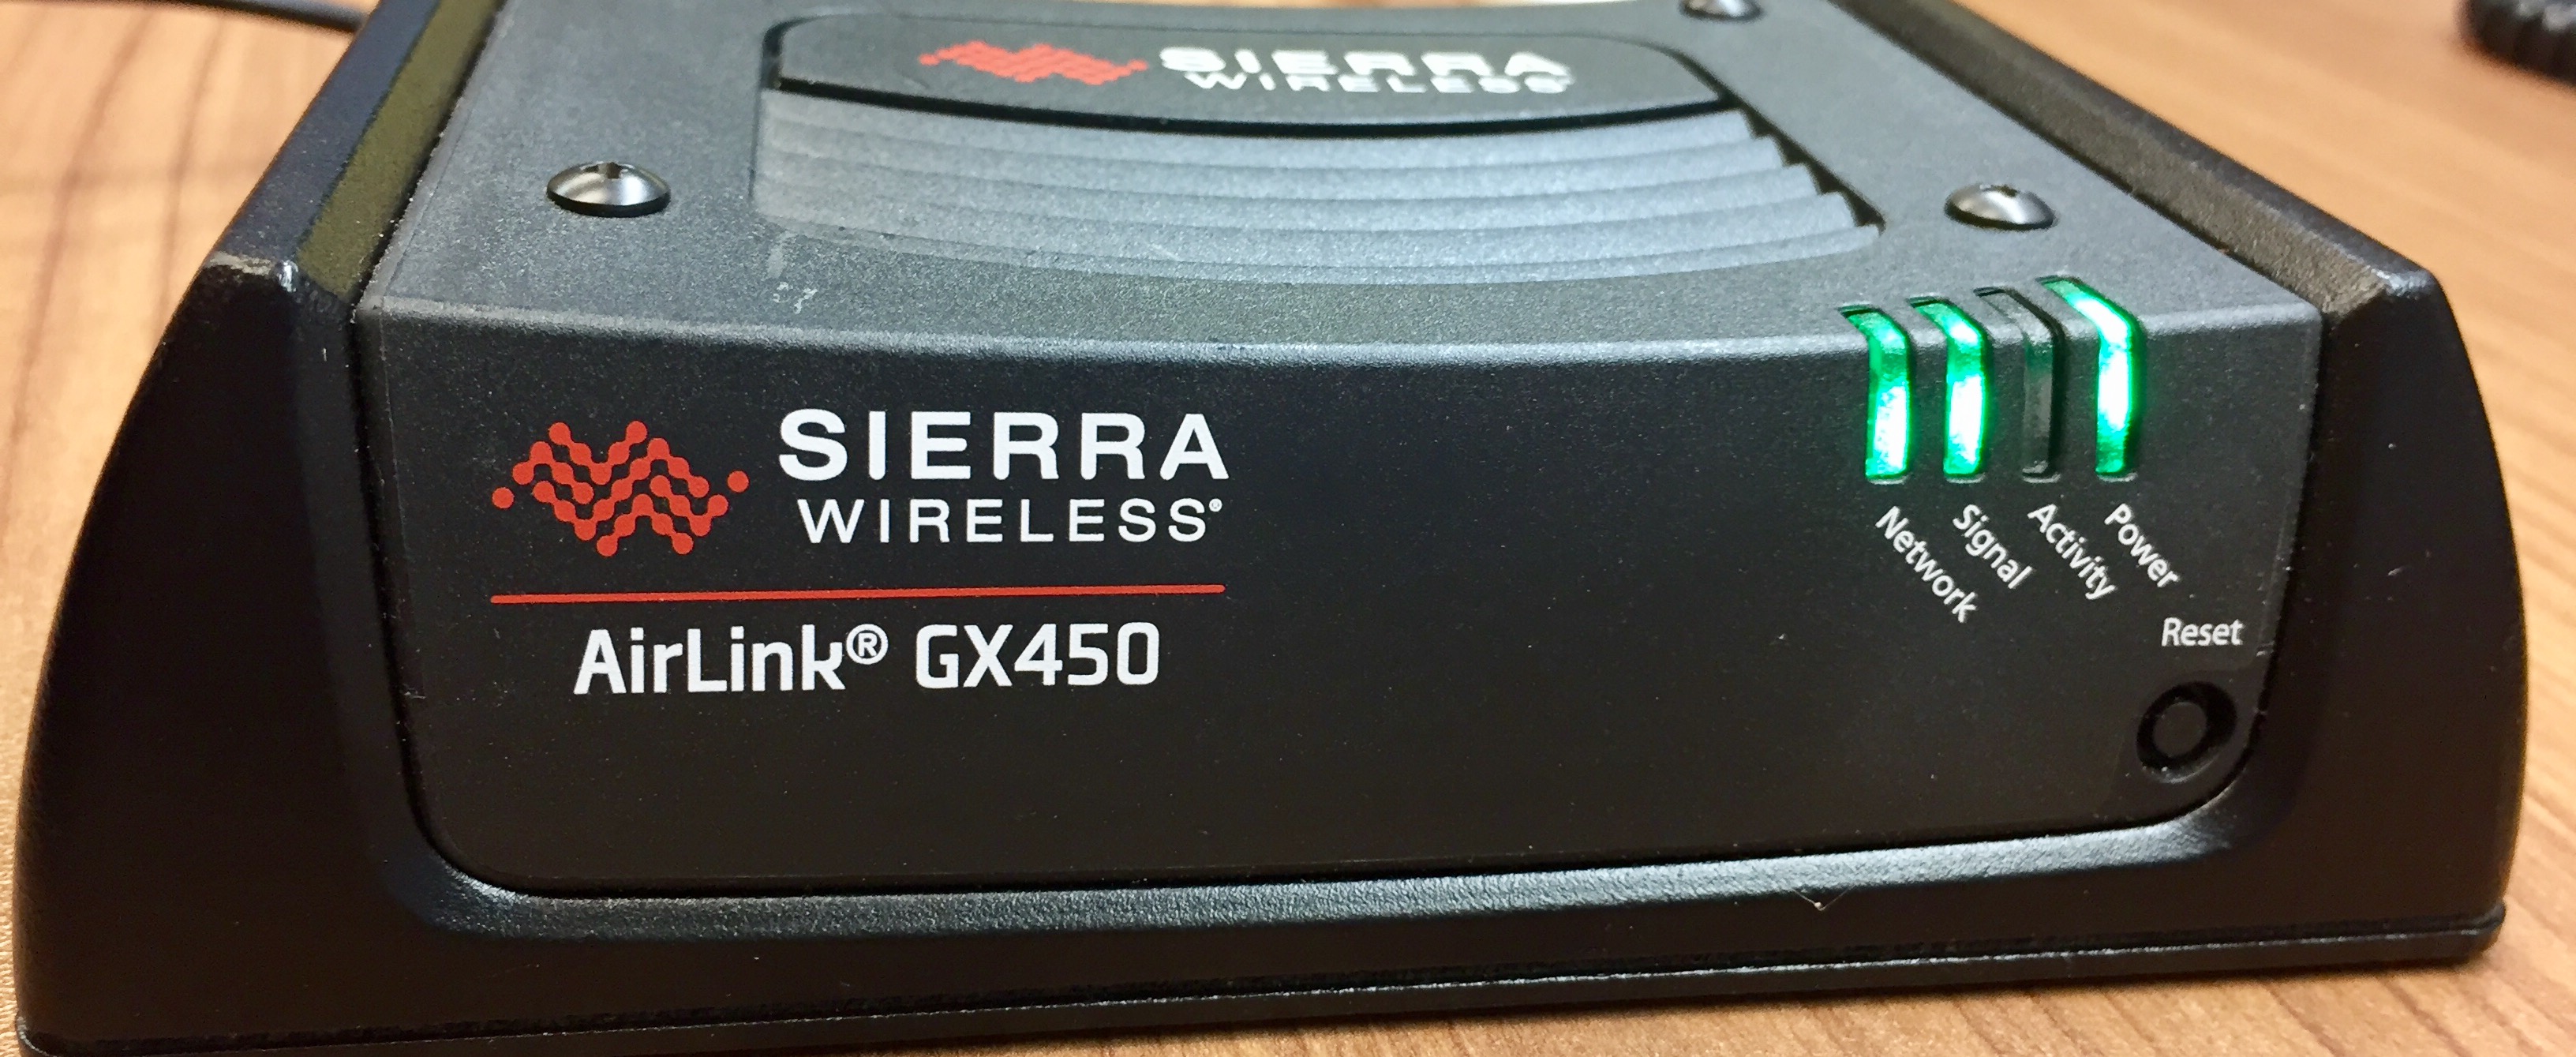

LED Blink Sequences
Power LED
- Off
- No power or input voltage ≥ 36 VDC or ≤ 9 VDC
- Solid Green
- Gateway is connected to nominal power and is operating normally.
- Flashing Amber /Green
- Gateway has a GPS fix
- Solid Amber
- Gateway is entering low power mode or system low level boot
- Solid Red
- Gateway is not operational (failure or in low power mode).
Signal LED
- Solid Green
- Good signal (RSSI ≥ -85 dBm)
- Solid Amber
- Marginal signal (-100 dBm < RSSI < -85 dBm)
- Solid Red
- Poor signal (-110 dBm ≤ RSSI ≤ -100 dBm)
- Flashing Red
- No signal (RSSI < -110 dBm)

7 Replies to “Sierra GX450 LTE Modem .•. Essentials Guide”
Note ssh to port 2332 will connect you directly to the serial port.
You can also use regular ssh to port 22.
How do I flash the Sierra Wireless Gx450 modem? We are switching to Verizon Sim cards.
It’s my understanding that you would only need to replace the radio firmware found here.
https://source.sierrawireless.com/resources/airlink/software_downloads/gx450/gx450-firmware-list/
I’m trying to debug IPSEC VPN, how do i log into the linux shell on the modem?
Could you please help me out. I’m going to configure GX450 as Nat device which uses 4G as WAN interface and Ethernet as Lan interface.
My configuration is:
1. Reset GX450 to default factory.
2. Plug-in SIM card and it connect to 4G. Here I can check ping to google.com
3. Navigate to Security tab and enable Port Forwarding
4. From Iphone, I access website that was hosted on PC but connection is refused.
Please can you tell me whether I missed any configuration?
Most cellular data service providers perform their own NAT so you may have a double NAT situation. This is true for AT&T and T-Mobile in the United States. Some carriers do offer special plans that will give you a public (non-natted) IP address but they are more expensive.
I’m trying to change my radio firmware but i keep getting “device full” errors during the installation phase. how can i clear up space in gx450 (old firmware images?) ? Thanks