7 Essential Gutenberg Tips — get to know the new WordPress editor.
If you are reading this then you probably recently installed the Gutenberg editor as presented on your WordPress site’s Dashboard or you upgraded to WordPress 5.0. In either case, I would like to share some useful tips about using the Gutenberg editor to make your transition easy.
Tip 1 Start every block with a slash
By default, new blocks start out as paragraphs. You can hover the block with your mouse and change the block type, but a faster way is to start out by typing a slash /. You will be presented with a small autocomplete window to quickly set the block type. No mouse required.
Tip 2 Use [Shift] [Enter] for line breaks
While typing in a paragraph block pressing [enter] will create a new block below the current one. If your intention is to simply insert a line break press [shift] + [enter] instead. This behavior is consistent with other word processors such as MS Word.
Tip 3 Show/hide block code editor using [Ctrl][Alt][Shift] + M
Gutenberg code blocks are not really html or wordpress shortcodes, they are an internal tags syntax. But when you want to switch between the visual editor and the code editor just hit [Ctrl][Alt][Shift] + M. I know, it’s a bit of finger acrobats to press all those keys but simpler keyboard shortcuts are already reserved by your web browser. You can also toggle the on/off the code editor from the top right triple-dot menu.
Tip 4 How to insert a read more break mid-block
You can insert a new block and type “/more” in the visual editor but that doesn’t work if you want the break to be mid-paragraph. The way to precisely insert the break is to switch to the code editor ([Ctrl][Alt][Shift] + M) and paste in the <!–more–> tag.
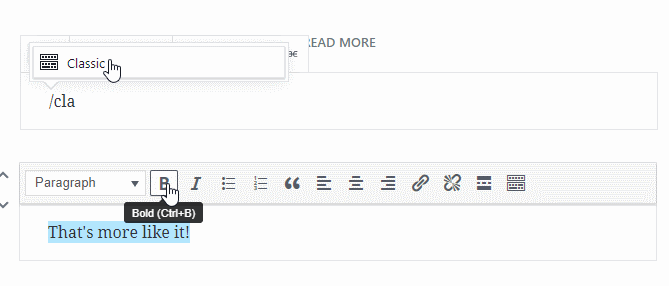
Tip 5 Classic WYSIWYG block
Create a new block and type “/classic” to get the old-style wordpress editor toolbar that feels more familiar.
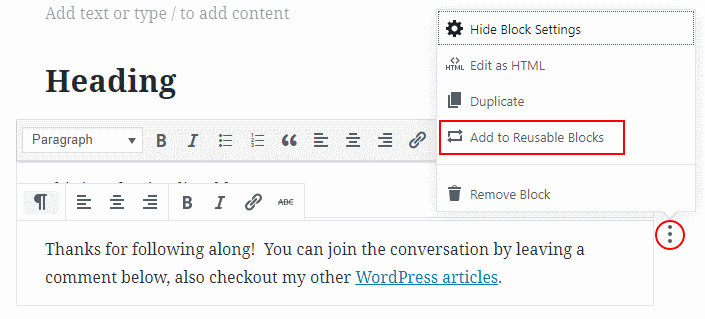
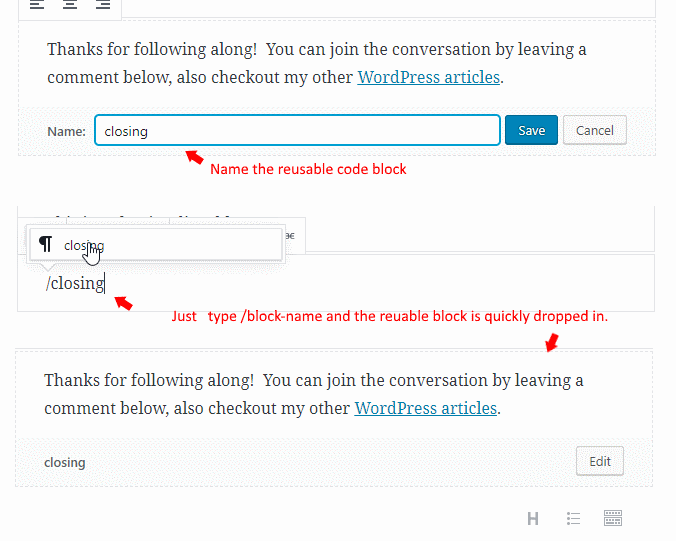
Tip 6 Create reusable blocks
I end most articles with something like “Thanks for following along…leave a comment below…checkout my other articles about some-category“. With the Gutenberg editor, you can now create reusable blocks and just splat them into your articles as needed. Using reusable blocks can save you time if you include the same block of content in multiple articles.
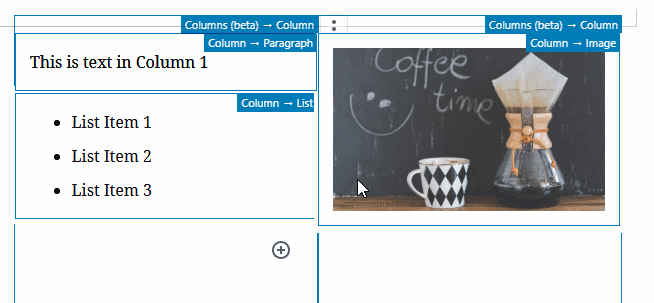
Tip 7 Layout content into multiple columns using the Columns block
Most WordPress Themes don’t have built in support for multi-column layouts, this has always been a pain point in WordPress. You would have to switch to the html editor and sprinkle in some <div>’s & CSS. Now you can just use the Columns block type and nest your content inside. The columns block is currently tagged beta so I’m not sure if it supports more than two columns at a time. Do you know? leave a comment below
The Gutenberg editor will be the default editor for WordPress 5 but you can install it today on 4.9.x installations.
If you’re not ready to install Gutenberg on your production website you can give it a test drive over at wordpress.org or read more on the plugin page.
Hey! Thanks for following along with this short Gutenberg tutorial. If you have more Gutenberg editor tips to share please leave a comment below.
